Tech Patch Repair System | Permanent Repair of Poly & Metal Tanks & Pipes
Highlighting the results of our “Competition” in a variety of environments.
Insights from End Users
CompositesCentral Forum – “bonding dissimilar materials (HDPE to epoxy/fiberglass)”
Users unanimously note that HDPE is notoriously difficult to bond with epoxy and fiberglass, requiring special surface treatments and proprietary adhesives. One user writes:
“epoxies will not work here” resinlibrary.com+14forum.compositescentral.org+14skidsteerforum.com+14Boat Design Net – “Repairing HDPE”
The community agrees that welding or melting is effectively the only permanent repair method. Fiberglass and epoxy are ruled out because “virtually nothing sticks to [wax‑y] polymers”—including HDPE—making adhesive repairs unreliable boatdesign.net.FiberglassRV Forum – “fixed‑my‑water‑tank‑with‑fiberglass”
One enthusiast concludes bluntly:
“If the tank is HDPE or polyethylene of any kind the repair is doomed to fail … fiberglass forms chemical and mechanical bonds only to similar phenolic resins, not plastics.” en.wikipedia.org+13fiberglassrv.com+13mig-welding.co.uk+13SkidsteerForum – “Hydraulic reserve tank repair with fiberglass ?”
A member warns:
“Fiberglassing a plastic tank would make me nervous … vibration, expansion could make it just fall off.” skidsteerforum.comOldMiniBikes Forum – “Plastic Gas Tank Repair”
They clearly state:
“Epoxy, or any other adhesive is not going to work as a permanent repair.” gsctanks.com+3oldminibikes.com+3mig-welding.co.uk+3goodsamesp.com+5en.wikipedia.org+5resinlibrary.com+5Practical Sailor (“Repairing Plastic Tanks”)
A test comparing various repair methods found that fiberglass/epoxy kits failed under flex, promptly detaching after bending—although polyurethane-based options like G‑Flex had somewhat better results. The study concludes that welding plastic is still the most reliable repair method practical-sailor.com+1fiberglassrv.com+1.
The “Good News” for you – the Tech Patch Repair System is a permanent repair system for poly tanks and pipes which also works on metal pipes and tanks.
Applied correctly, the Tech Patch Repair System permanently repair HPDE pipes and tanks, steel pipes, copper pipes, Two points to make. First, the application process is not difficult and, secondly, energy, energy from trauma, energy from shock stress, energy from applied stress will cause a Tech Patch or Tech Wrap to fail. What will not cause failure is the weather, chemicals, fuels (gasoline, diesel), aging, etc. Finally, neither Tech-Patches or Tech Wraps age.
If Tech-Patches are so good, why aren’t they in stores? And why haven’t we heard about them?
To secure shelf space in retail stores, we need to aerosolize our “Performance Tools”—the essential components of the Tech Patch Repair System that make permanent polymer bonding possible. We’re actively working to make that happen. Once the aerosol versions are ready, the next challenge will be getting retail chains to carry the full Tech Patch Repair System. That’s where you come in. When a Tech Patch works for you—and we’re confident it will—please take a moment to leave a review. Your feedback is incredibly valuable and plays a key role in helping us expand access to this breakthrough repair technology. Thank you in advance for your support.
Instructions for permanently repairing your HDPE (Plastic) Gas tank with the Tech Patch Repair System.
- Nitrile gloves are recommended.
- If the problem is a crack, you MUST drill a small hole at each end of the crack to prevent propagation.
- Rough (abrade) the poly surface to below the “sheen”. The roughed area must cover 1 inch all the around the damage which is what the A-Patch must cover.
- Remove the residue with a cleaner that will NOT leave a residue.
- Saturate the roughed surface with the Poly Prep. Let dry. Drying takes 15 – 30 seconds.
- Spray a light mist of our catalyst, the Activator/Accelerator, on the roughed Surface. Let dry.
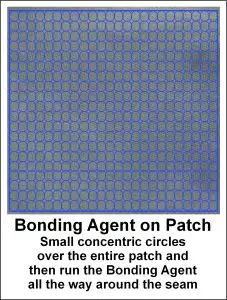
- Apply the adhesive to the entire area of the A-Patch using small concentric circles, then tun a bead of the Bonding Agent all the way around the perimeter. Thorough but NOT heavy. Visual below.
- Apply the A-Patch to the tank by grabbing diagonal corners, being careful of the Bonding Agent, applying tension and placing the A-Patch over the hole or crack.
- Press down the edges of the A-Patch with your fingers.
- Using a glue squeegee held at a firm angle, begin at the exact center of the A-Patch and work outward in smooth, deliberate strokes. Apply strong, consistent pressure as you move from the center to the edges—this ensures the adhesive spreads evenly, fills any micro-voids, while achieving full surface contact. The center-out technique helps eliminate trapped air and maximizes the molecular bonding potential of the adhesive. Maintain a steady pace and firm pressure throughout to create a uniform, high-integrity bond across the entire patch.
- Warm the patch surface with a heat gun or hair dryer to about 120° F (or 40° C). By touch, warm until the surface is very warm, just below hot. When it gets to that point, an exothermic chemical reaction starts, and the surface will become hot. You can stop heating the A-Patch at that point.
- Apply beads of the Bonding Agent to the top and around the perimeter of the A-Patch.
- Use the Glue Squeegee to spread the Bonding Agent over the entire area of the A-Patch, making sure that the edges are covered.
- Repeat 12 and 13 twice more.
- Spray a light mist of the catalyst, the Activator/Accelerator on the Bonding Agent.
- Visually inspect the A-Patch and correct any problems.
Plastic Gas Tank Repair
The video below applies to all types and styles of plastic gas tanks and includes HDPE tanks, polypropylene tanks and the extremely rate nylon gas tanks. A-Patches actually work on metal tanks in additon to plastic tanks.
Why Patches Fail
Proudly, our A-Patches and Tech Wraps are effective with a 99% plus success rate. Of course, there have been situations where A-Patches have failed. These failures have been because of application errors. In virtually every case, the second attempt was successful. There are three primary reasons why an A-Patch fails. These are listed below.
- A fold or crease in the A-Patch. This gives fuels a way out.
- Too much Bonding Agent was left between the tank and the A-Patch. Molecular bonding requires surface-to-surface contact and with that bonding the Bonding Agent become part of the structure.
- The surface does not get warm enough. Therefore, the required exothermic chemical reaction does not start.

The Patch-on-Patch Technique
Occasionally, the damaged area of a tank is in an inconvenient spot. Too close to a sharp edge. Too close to a flange. Whatever the reason, here are the steps to ensure a successful repair.
- Nitrile gloves are recommended.
- Visually inspect the problem. You are going to need at lease 1/4 inch of available space around the entire damaged area.
- Size and cut the initial A-Patch
- If the problem is a crack, you MUST drill a small hole at each end of the crack to prevent propagation.
- Rough (abrade) the poly surface to below the “sheen”. The roughed area must cover 1 inch all the around the damage which is what the A-Patch must cover.
- Remove the residue with a cleaner that will NOT leave a residue.
- Saturate the roughed surface with the Poly Prep. Let dry. Drying takes 15 – 30 seconds.
- Spray a light mist of our catalyst, the Activator/Accelerator, on the roughed Surface. Let dry.
- Apply the adhesive to the entire area of the A-Patch using small concentric circles, then tun a bead of the Bonding Agent all the way around the perimeter. Apply the Bonding Agent thoroughly but NOT heavy. Visual below.
- Apply the precut A-Patch to the tank by grabbing diagonal corners, being careful with the Bonding Agent, applying tension and placing the A-Patch over the hole or crack.
- Press down the edges of the A-Patch with your fingers.
- Using a glue squeegee held at a firm angle, begin at the exact center of the A-Patch and work outward in smooth, deliberate strokes. Apply strong, consistent pressure as you move from the center to the edges—this ensures the adhesive spreads evenly, fills any micro-voids, while achieving full surface contact. The center-out technique helps eliminate trapped air and maximizes the molecular bonding potential of the adhesive. Maintain a steady pace and firm pressure throughout to create a uniform, high-integrity bond across the entire patch.
- Cut lines into the second A-Patch, but not into the area of the first patch. In some cases you will want to cut our pieces of the second patch.
- Once done, apply the Bonding Agent to the second larger A-Patch using the same techniques in applying the Bonding Agent.
- Apply the second patch over the first using the glue squeegee in the same way.
- Spray the seams with a light mist of the catalyst.
- Warm the tank surface with a heat gun or hair dryer to about 120° F (or 40° C). By touch, warm until the surface is very warm, just below hot. When it gets to that point, an exothermic chemical reaction starts, and the surface will become hot. You can stop heating the A-Patch at that point.
- Apply beads of the Bonding Agent to the top and around the perimeter of the second A-Patch.
- Use the Glue Squeegee to spread the Bonding Agent over the entire area of the A-Patch, making sure that the edges are covered.
- Repeat 12 and 13 twice more.
- Spray a light mist of the catalyst, the Activator/Accelerator on the Bonding Agent.
- Visually inspect the A-Patch and correct any problems.
Engagement
At Tech-Bond, Engagement is not just a word—it’s a philosophy, a mindset, and our preferred way of operating. Since 2016, we have been actively implementing and refining both the Polymer Bonding Process and the Tech Patch Repair System (TPRS), and we are still learning every day. We learn through application, we learn through testing, and—most importantly—we learn from our clients. Their challenges fuel our innovation.
The Tech Patch Repair System, our first global solution, was born from a real-world request: to find a way to stop active leaks in gasoline and diesel tankers on the highway. While TPRS ultimately proved unsuitable for that exact scenario, the journey led us to an entirely new class of solutions—permanent repairs for HDPE gas tanks, HDPE water tanks and pipes, metal pipes, and more. These field-tested capabilities emerged from hands-on problem solving and direct collaboration.
Since our founding, Tech-Bond has also partnered with a number of small, entrepreneurial companies to help bring new products to market—solutions made possible through our technology, experience, and shared vision for innovation. Many of these products are already commercially available, and we’re eager to continue collaborating with forward-thinking teams that value creativity, performance, and long-term partnership.
A simple request
If you have a question, if you’re having a problem with a patch, please contact us at 614 327 8884 or click on the button below.